Thursday, March 21, 2024

Sop Buntut Goreng (Fried Oxtail Soup)

Ingredients
1 oxtail, cut at all the joints
6 cloves garlic 
1 brown onion, quartered 
8-12 cloves 
1 tbsp cinnamon powder 
2 tbsp sea salt, divided 
1 yellow capsicum, sliced 
300g (10.5 oz) snow peas, trimmed 
1 brown onion, sliced 
1 punnet cherry tomatoes 
300g (10.5 oz) flour 
1 tbsp garlic powder 
1 tbsp ground coriander 
oil or tallow for frying 

Method 
  1. Begin by placing the oxtail into a pressure cooker along with the quartered onion, garlic, cloves, 1 tablespoon of salt, and cinnamon powder. Cover with water, secure the lid, and turn the heat to high. Once it reaches pressure, reduce the heat to medium and cook under high pressure for 40 minutes. 
  2. While the tails are cooking, prepare the flour mixture. In a bowl, mix together the flour, 1 tablespoon of salt, garlic powder, and ground coriander. 
  3. Once the tail has finished cooking, carefully release the pressure from the pressure cooker. Then, remove the oxtail from the pot and place it onto a rack to dry slightly. 
  4. Bring the stock in the pot back to a simmer and reduce by 1/4. Once reduced, add the capsicum, snow peas, cherry tomatoes, and sliced onions, and simmer for 5 minutes. 
  5. Dust the oxtail in the flour mixture, shaking off any excess. Fry the oxtail in tallow at 350°F (180°C) for 4-5 minutes or until crispy and golden brown. 
  6. Serve the soup alongside a pile of the fried oxtail and enjoy!
Recipe by Andy Cooks

Saturday, January 20, 2024

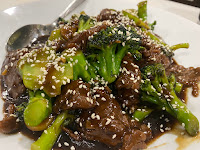
Beef with Ginger & Broccoli

Prep Time : 10 min
Cook Time : 10 min
Marinating time : 15 min
Total Time : 25 min
Yield: 4 servings

Ingredients
For marinating the beef:
1 pound beef flank steak thinly sliced (between ⅛ and ¼ inch thick)
3 tablespoons water
1 tablespoon Shaoxing rice wine
½ teaspoon kosher salt (a little less if using fine salt)
¼ teaspoon baking soda
2 tablespoons cornstarch
1 tablespoon oil any neutral oil will do

For the stir fry sauce:
½ cup soy sauce light sodium*
½ cup water
3 tablespoons granulated sugar
2 tablespoons cornstarch
1 teaspoon toasted sesame oil

For the rest of the dish:
1 pound broccoli cut into florets
1 tablespoon garlic minced (about 2 cloves)
1 tablespoon ginger peeled and minced (about an inch knob)
Oil as needed for cooking
Toasted sesame seed (optional for garnish)

Instructions
  1. Marinate the beef:
    1. In a mixing bowl, combine the sliced flank steak, water, shaoxing rice wine, salt and baking soda. Mix well until the beef has absorbed most of the liquids.
    2. Next, add the cornstarch and mix until the beef is well coated. Finish the marinade by adding oil. Mix until evenly combined. Set the beef aside to marinate for about 10 to 15 minutes as you prepare the rest of the ingredients. You can also let the beef marinate overnight.
  2. Prepare the sauce:
    1. In a bowl, add all the ingredients for the sauce (soy sauce, water, sugar, cornstarch, and sesame oil). Mix until no more cornstarch clumps are visible. Set aside until needed.
  3. Make the beef and broccoli:
    1. While the beef is marinating, bring a medium pot of water to a boil. Add the broccoli florets and boil them for 30 seconds to 3 minutes, depending on your preferred tenderness. The cook time will also depend on how big the broccoli florets are. Once cooked, drain the broccoli and set aside.
    2. In a wok or sauté pan over medium high heat, add enough oil to coat the bottom. Once the oil is hot, add the marinated beef and cook until the beef is just cooked. Cook in small batches if necessary and make sure to separate the beef so that each piece is evenly cooked. Remove from the wok/pan and set aside.
    3. Remove excess oil and keep about 2 tablespoons of oil in the pan. Reduce the heat to medium. Add the minced garlic and ginger and sauté until fragrant, about 15 seconds.
    4. Give the prepared stir fry sauce a good stir and add it to the sauteed garlic and ginger. Bring the sauce to a simmer while stirring frequently. Once the sauce has thickened and looks glossy, add the beef and the broccoli. Stir and toss everything together until the beef and the broccoli are well coated in sauce.
    5. Transfer the beef and broccoli onto a serving plate and garnish with sesame seeds if you wish. Enjoy it while it's hot!

Friday, January 19, 2024

Taco Bell Chalupa

Ingredients
Queso Sauce
30g unsalted butter 
half yellow onion (finely diced)
1 poblano pepper (seeded & finely chopped)
3 cloves garlic (finely chopped)
Salt & pepper to taste
1 Tbsp AP flour
360ml whole milk
150g grated American cheese
225g cheddar cheese (grated)

Seasoned Beef
560g minced beef
110g minced smoky bacon
35g tomato paste
1.5 tsp cumin powder
1/2 tsp onion powder
1 tsp mushroom soup base powder
2 tsp smoked paprika
Black pepper & salt to taste
1 cup water 

Chalupa
375g AP flour
1 tsp salt
1 Tbsp castor sugar
2 1/2 tsp baking powder
1/240ml cup milk
2 Tbsp vegetable oil
Vegetable oil for frying

Toppings
1/2 Ice berg lettuce (shreaded)
1/2 jicama (shreaded)
3 Tbsp fresh cilantro (finely chopped)
200g monterey cheese (grated)
200g cheddar cheese (grated)
1 tomato (diced)
salt & pepper
Olive oil
Full fat sour cream

Method:
  1. To make queso sauce, 
    1. melt butter & fry onion, garlic & pepper for 3-5 mins to sweat. 
    2. Then add flour, cook & stir for 1 minute, then add milk & stir until mix thickens.
    3. Turn off the heat & mix in cheeses until melted.
    4. Cover & leave on low flame to keep warm.
  2. To make the minced beef,
    1. dry fry the beef & bacon over high heat until brown & slightly crispy. 
    2. Then reduce heat to medium & add tomato paste & saute for 1 min.
    3. Add cumin powder, onion powder, mushroom powder, smoked paprika, salt & pepper & cook for 1 min before adding water & bringing to boil.
    4. Reduce to simmer & stir until almost no liquid remains (10-15 mins).
    5. Turn off heat & stir in raw minced garlic.
  3. To make toppings,
    1. mix together lettuce, jicama & cilantro.
    2. mix together cheeses.
    3. mix together tomato, salt, pepper & olive oil.
  4. To make chalupa,
    1. Mix flour, salt, sugar, baking powder together & add milk & vegetable oil & mix until rough dough forms. Knead for 2-4 mins until smooth. Cover & rest for 15 mins.
    2. Heat frying oil to 180°C.
    3. Divide dough into 8 pieces (67g each) & roll pieces into balls. Flatten with rolling pin into 6" discs. Poke holes throughout disc with a fork.
    4. Gently fry dough for 15 secs, then remove & gently press dough into taco shape with thongs. Then continue to fry for 30 secs, using thongs to hold the taco shape. Then continue frying until golden brown (1-2 mins). 
    5. Turn onto wire rack & season with salt to taste.
Recipe & video by Joshua Weissman

Beef Chalupa

Ingredients
Meat filling:
500g ground beef
1 small onion chopped
¼ cup all purpose flour
2 tsp chili powder
1 tsp salt
½ tsp pepper
½ tsp paprika
½ tsp cumin
¼ tsp garlic powder
1 Tbsp vegetable oil

Chalupas:
2 ½ cups flour
1 Tbsp baking powder
½ tsp salt
1 Tbsp vegetable oil plus more for frying
1 cup milk

Optional toppings or fillings:
sour cream
shredded cheddar cheese
shredded lettuce
diced tomatoes
salsa
refried beans
olive
guacamole
pico de gallo
cilantro
hot sauce

Instructions
Make the filling
  1. In a large mixing bowl, combine ground beef with onion, flour, chili powder, salt, pepper, paprika, cumin, and garlic.
  2. Heat oil in a large skillet or dutch oven to medium-high heat. Add in the beef mixture. Cook beef mixture, stirring and breaking up chunks often. Cook until no pink is visible. Cover the pan, turn off the heat but keep this warm for later.
Make the dough
  1. Whisk together the dry ingredients: 2 cups of flour, baking powder, and salt.
  2. Mix the oil into the flour mixture.
  3. Gradually stir in 1 cup of milk. Mix in the other ½ cup flour. Knead this soft dough with your hands. If the mixture is too dry, add milk a little at a time. If the dough is too wet, add flour a little at a time. Do not over knead the dough as this will make it tough.
Shape the dough
  1. Flour hands and shape dough into a long cylinder. Cut it into 8 equal parts. On a floured surface, shape each of the 8 pieces into a round circle, about 6 inches across. (I found it easiest to use a rolling pin to achieve this. Use a fork to poke a few holes in each of the disks.
Cook the chalupas
  1. Place oil (enough to be 1-2 inches deep) in a large skillet. Heat to medium heat.
  2. Gently place one disk at a time into the hot oil. As you deep fry, the disk will start to puff up and rise to the top, use tongs to flip it over. Once you’ve flipped it, use the tongs to pull one side of the disk up over the other side. We are folding it into a shell shape.
  3. Allow this to cook until the bottom is lightly golden, then flip and allow the other side to become golden brown as well.
  4. As each shell is cooked, remove to a plate lined with paper towel to remove excess oil.
Now it’s time to build chalupas! Fill the shells with the meat mixture and desired taco fixings.

Thursday, January 18, 2024

Roti Naik

Ingredients (2 loaves)
500g bread flour
150g castor sugar
11g dried yeast
20g milk powder
1/2 tsp salt
50g evaporated milk
150g water
1 egg (large)
75g butter
10g bread softener
a little yellow food colouring

Method:
  1. Mix first 5 dry ingredients together well.
  2. Combine milk, water & egg & slowly add to flour in the mixer for about 3 mins until well combined.
  3. Then add butter together with bread softener & continue kneading in mixer for about 7 to 10 mins. Towards the end, add food colouring & continue kneading until well combined.
  4. Turn out dough on floured surface & do quick knead to form a ball & put into covered bowl to rest for 1 hour.
  5. Turn out risen dough & divide into 18 balls (64g each) & place balls into 2 pre-greased baking tins.
  6. Cover & let rest for 1 hour.
  7. Pre-heat oven to 165°C.
  8. Then bake in oven for 25-30min.
  9. After removing from oven, ease out of baking tin to cool.


Wednesday, December 14, 2022

Parkin (BBC Good Food)

Ingredients
200g butter, plus extra for greasing
1 large egg
4 tbsp milk
200g golden syrup
85g treacle
85g light soft brown sugar
100g medium oatmeal
250g self-raising flour
1 tbsp ground ginger

Method
  1. Heat the oven to 160C/140C fan/gas 3. Butter a deep 22cm square cake tin and line with baking parchment. Beat the egg and milk together with a fork.
  2. Gently melt the syrup, treacle, sugar and butter together in a large pan until the sugar has dissolved. Remove from the heat. Mix together the oatmeal, flour and ginger and stir into the syrup mixture, followed by the egg and milk.
  3. Pour the mixture into the tin and bake for 50 mins – 1 hr until the cake feels firm and a little crusty on top. Cool in the tin then wrap in more parchment and foil. 
  4. Keep for up to five days before eating if you can – it’ll become softer and stickier the longer you leave it, up to two weeks.
Recipe from BBC Good Food

Tuesday, December 13, 2022

Basic almond nougat

20 min prep
30 min cook

Ingredients
4 sheets (about 15.5 x 23.5cm each) edible ricepaper
200g blanched almonds
560g (2 1/2 cups) sugar
80ml (1/3 cup) water
500g glucose syrup (Colonial Farms brand)
2 egg whites, at room temperature
1 tsp vanilla essence

Directions
  1. Preheat oven to 170°C. Line an 18 x 28cm slab pan with baking paper, allowing it to overhang the sides. Place 2 sheets of the rice paper in the base of the lined pan & reserve balance 2 sheets for the top of the nougat. 
  2. Toast the almonds in preheated oven for 7-10 minutes or until light golden. Set aside for 5 minutes to cool slightly. Chop and set aside.
  3. Place the sugar and water in a medium saucepan. Use a wet spoon to spoon the glucose syrup into the pan. (To soften glucose in the microwave, see microwave tip.) The glucose prevents crystallisation and helps to ensure the nougat has the correct texture. 
  4. Place the pan over medium-low heat. Stir with a wooden spoon, brushing down the sides of the pan occasionally with a pastry brush dipped in warm water, until the sugar dissolves (this will take about 10 minutes). 
  5. Fill the sink with 10cm of cold water. 
  6. Place the egg whites in a large, clean, dry heatproof bowl. 
  7. Place a sugar (candy) thermometer in the pan. Increase heat to high and bring to the boil. Reduce heat to medium-high and boil, uncovered, without stirring. When the syrup reaches about 120°C, use the whisk attachment on an electric stand beater to whisk the egg whites until firm peaks form. It is important to use a stand mixer because, unlike a hand-held electric beater, it has a motor powerful enough to beat the nougat mixture.
  8. When the sugar syrup reaches 140°C, immediately remove the pan from heat and place the base of the pan in the sink of cold water for 5 seconds, or until the bubbles subside. This stops the syrup temperature increasing (the temperature of the syrup determines the texture of the nougat. When the syrup is cooked to 140°C, a chewy nougat results; if the syrup is cooked to 150°C, a harder nougat results). 
  9. With the beater on medium speed, slowly pour hot syrup into the egg whites in a thin, steady stream. Don't pour the syrup down side of the bowl or onto the whisk as it may set before being incorporated into egg whites.
  10. Once all the syrup is incorporated, whisk for a further 3 minutes or until the mixture is thick and glossy. 
  11. Use a wooden spoon to mix the almonds and vanilla essence into egg white mixture until well combined. It is important to work quickly or the nougat will begin to set. Also make sure the nuts and vanilla essence are at room temperature - if they are cold, the mixture will set too rapidly, making it difficult to transfer to the pan.
  12. Quickly pour the nougat evenly into the lined pan using a spatula to scrape down the side of the bowl. Use the spatula or the back of a spoon dipped in hot water to spread the nougat evenly into the pan and smooth the surface. Place the remaining rice paper or piece of greased foil over the top of the nougat and press down gently. Set aside in a cool, dry place for 6 hours or until set.
  13. Lift the nougat from the pan and place on a cutting board. Remove baking paper or foil (if using rice paper, don't remove it, as it is edible). Use a serrated knife in a sawing motion to cut the nougat crossways into 3cm-wide pieces and then cut each piece into about 4cm lengths. 
  14. Place nougat in a clean, dry airtight container, separating layers with non-stick baking paper. Keep in a cool, dry place for 1-2 weeks or in the fridge for up to 3 weeks. If storing nougat in the fridge, bring to room temperature before serving.

Almond Nougat

Ingredients
200 g Almonds 
125 g sugar 
125 g honey 
1 egg white

Instructions
  1. Boil almonds for 3 mins. Drain & remove the skins.
  2. Roast the almonds for 10-15 mins at 170°C.
  3. Whisk the egg white until thick consistency.
  4. Add the sugar & honey to a pan over low heat, whilst mixing constantly until sugar is dissolved.
  5. Remove the sugar mix from heat & add the egg white into the pan slowly.
  6. Whisk the mixture over low heat until well incorporated.
  7. Remove from heat & add warm almonds to the mixture & mix well.
  8. Pour in moulds & allow to cool, then refrigerate for 12 hours.
  9. Cut into squares & store in air tight container.

Parkin (Ginger Cake)

Ingredients 
1½ cups steel cut oats (pulsed in food processor) 
¾ cup all purpose/plain flour 
1½ tsp baking powder 
2 tsp ginger powder 
1 tsp all spice 
¼ tsp nutmeg 
¼ tsp salt 
¼ cup golden syrup or corn syrup 
⅔ cup black treacle or molasses 
¾ cup brown sugar 
½ cup butter 
¼ cup crystallized ginger, finely chopped 
1 egg, lightly beaten 
2 Tbsp milk 

Directions
  1. Preheat oven to 300°F (150°C). Grease an 8” x 8” baking tin. 
  2. Measure out the steel cut oats and put through a food processor to break down. The oats should not be a flour and some chunks should remain. 
  3. Add all the dry ingredients into a large mixing bowl and combine: flour, oats, ginger, nutmeg, all spice, salt, and baking powder. 
  4. In a small saucepan add in butter, brown sugar, black treacle/molasses, golden syrup/corn syrup. Stir until the butter and sugar have melted, making sure not to boil. Then remove from the heat and allow to cool for 5 minutes. 
  5. Pour the warm sugar mixture into the dry ingredients, and stir until combined. Then stir in the crystallized ginger pieces, the egg, and milk. 
  6. Pour the batter into the baking tin and bake in the oven for approximately 1 hour and 15 minutes. Use a toothpick to check if it is fully baked - it is ready if it comes out clean. Allow the Parkin to cool in the baking tin for a few minutes. 
  7. Then turn it face down onto a cutting board, slide the baking tin out, and remove the parchment paper. 
  8. Allow the parkin to cool for 10-15 minutes before cutting into equal sized squares. Store in an airtight container and ALLOW IT TO REST FOR 2-3 DAYS. It takes this time for the flavor and sticky texture to fully develop...it WILL be worth the wait so be patient!
Recipe from Susu's Cookbook

Shortbread

Prep 15 mins
Bake 35 mins
Total 50 mins
Yield 2 dozen shortbread wedges

Ingredients
16 Tbsp (227g) salted butter, at cool room temperature*
1 cup (113g) confectioners' sugar
2 tsp Vanilla Extract
1/4 tsp almond extract, optional, or the flavor of your choice
2 cups (240g) All-Purpose Flour

Instructions
  1. Preheat the oven to 150°C. Lightly grease two 9" round or 8" square cake pans. If you worry about the shortbread possibly sticking in your particular pans, line them with parchment and grease the parchment.
  2. In a medium-sized bowl, beat together the butter, sugar, and extracts, then beat in the flour. The mixture may seem a little dry at first; keep beating until a stiff dough forms. If necessary, dribble in up to 1 tablespoon of water to bring the dough together. 
  3. Divide the dough in half (if you have a scale, each half will weigh about 300g), and press each half into one of the prepared pans, smoothing the surface with your fingers or a mini rolling pin. If you're having trouble pressing the shortbread flat in the pan because it's sticking to your fingers, cover it with a piece of plastic wrap and push on the wrap. Remove the wrap before baking.
  4. Use a fork to prick (dock) the dough all over; this allows any steam to escape, and prevents the shortbread from bubbling as it bakes. Prick the dough in a random pattern, or create a pretty design.
  5. Bake the shortbread until it's a light golden brown across the top surface and a deeper golden brown around the edges, about 35 minutes.
  6. Remove the shortbread from the oven and turn it out of the pans and onto a clean work surface.
  7. Immediately cut the shortbread, while it's warm; if you wait until it's cool, it won't cut easily. Using a pizza wheel or sharp knife, cut each round into 12 wedges. If you've baked squares, cut each square into four smaller squares, then cut each of those into thirds to make a total of 24 strips (12 per pan). Transfer the shortbread wedges or strips to a rack to cool.
  8. Serve as is, or garnish as desired (see "tips," below).
  9. Store shortbread, well wrapped, for up to a week; freeze for longer storage. The flavor improves as the shortbread ages.
Tips from our Bakers
  1. In this case salted butter is preferred because, with no liquid in the recipe, it's impossible for added salt to disperse itself fully through the shortbread dough; you end up with unpleasantly gritty bits of salt in each bite.
  2. Vary the flavor of your shortbread with the following simple additions.
  • For ginger shortbread: Add 1/3 cup finely diced crystallized ginger and 1 teaspoon ginger.
  • For butter-pecan shortbread: Add 1/8 teaspoon butter-rum flavor and 1 cup finely diced toasted pecans.
  • For chai-spiced shortbread: Add 1 teaspoon cinnamon, 1/4 teaspoon cardamom, and 1/8 teaspoon cloves.
  1. Want to garnish your plain shortbread? Drizzle the baked wedges or strips with melted caramel, or spread them with melted chocolate and sprinkle with nuts. Or set aside two cookies and spread the remainder with a thick layer of jam or preserves; crumble the reserved cookies and sprinkle the crumbs lightly over the jam-topped cookies.
  2. Want to make shortbread drop cookies? Drop the dough by teaspoonfuls onto a lightly greased or parchment-lined baking sheet. Flatten each ball of dough to about 3/8" thick; use the bottom of a drinking glass, the tines of a fork, a cookie stamp, or whatever implement you think will make a pretty pattern. Bake the cookies for about 25 minutes in a preheated 300°F oven, until they're set but not really beginning to brown. Remove them from the oven, and cool on the pans or on a rack. Yield: about 4 dozen small (1 3/8") cookies.

Monday, December 12, 2022

Perfect Banana Bread

Prep Time 10 mins
Cook Time 1 hr 5 mins
Total Time 1 hr 15 mins

Ingredients
⅓ cup (80g) butter, melted
4 large ripe bananas, mashed (1 ¼ to 1 ½ cups)
¾ cup (165g) granulated sugar
1 large egg, room temperature
1 tsp vanilla
1 ½ cups (186g) all-purpose flour
1 tsp baking soda
1 tsp baking powder
½ tsp kosher salt

Instructions
  1. Preheat oven to 180°C. Prepare an 8x4-inch loaf pan by spraying with nonstick spray.
  2. Melt butter and set aside to cool.
  3. In a large bowl, mash bananas with a fork. (You can use up to 5 regular sized bananas or 6 small bananas in this recipe.)
  4. Add butter, sugar, egg, and vanilla. Mix well.
  5. Add in flour, baking soda, baking powder, and salt and mix until ingredients are JUST incorporated. (Be careful not to overmix.)
  6. Pour the batter into the prepared loaf pan.
  7. Bake for 45 minutes. (Cover with aluminum foil if browning too quickly.)
  8. Bake for an additional 15-20 minutes, or until a toothpick comes out with crumbs, but not wet batter.
Nutrition
Calories: 288kcal

Recipe from I Am Baker

Sunday, December 11, 2022

Thai Holy Basil Stir Fry with Beef (Pad Kra Pao)

Ingredients
6 cloves garlic
3 Thai chilies, or as many as you can handle
¼ cup chopped mild red chilies, (see note 1)
⅓ cup julienned mild red chilies
2 Tbsp vegetable oil
12 oz ground beef, regular or lean
1 Tbsp + 2 tsp fish sauce
1 Tbsp granulated sugar
½ cup unsalted beef or chicken stock or water
½ tsp ground black pepper
1 ¼ cups holy basil or regular basil leaves, (see note 2)

Cooked Jasmine rice for serving
3 eggs, for fried eggs (1 per person)
Oil for frying eggs, as needed

Prik Nam Pla (optional condiment)
1-2 Thai chilies, chopped
2 Tbsp fish sauce
2 tsp lime juice
1 clove garlic, thinly sliced or chopped (optional)

Notes
  1. Mild red chilies are for colour and flavour, while the Thai chilies are for heat. Traditionally we use spur chilies (prik chee fa) for the mild peppers, but red anaheim or mini bell pepper will work. Regular red bell pepper flesh is a little thicker and more watery than ideal, but it will also be fine if that's the only thing you have! 
  2. Italian basil is my preferred substitute if holy basil is unavailable. Thai basil can also be used, and the dish will be just as tasty, but I find that the flavour of regular Italian basil is closer to that of holy basil.
Instructions
For the Prik Nam Pla
  1. Add chopped Thai chilies and garlic into a small bowl, then add the fish sauce and lime juice. Let this sit while you make the stir fry.
For the Stir Fry
  1. In a mortar and pestle, pound the Thai chilies into a fine paste. Add the garlic and the chopped mild chilies and pound into just a rough paste.
  2. Heat a wok or a large skillet over high heat, adding about 1 tablespoon of the oil if your beef is lean. Once the wok is very hot, add the beef and spread it out. Sear the beef without moving it until the underside is browned. Toss the beef, and notice how the beef will start to release quite a bit of liquid - keep stirring until all of this liquid has evaporated, and the beef starts to sizzle in its own fat. Once the beef is sizzling, allow it to cook without stirring for 15-20 seconds to brown the beef further and develop flavour, then toss, and repeat the browning 1-2 more times.
  3. Turn the heat down to medium, push the beef to one side of the pan, and if there isn’t much fat in the pan, add a little bit more oil just so there’s enough to saute the garlic. Add the garlic and chili paste and sauté in the oil for 30 seconds until aromatic and the garlic starts to turn golden, and then toss it with the beef.
  4. Turn the heat up to high and add about half of the stock or water, fish sauce, sugar, and black pepper; toss to mix well. Add the julienned mild chilies and toss for 30 seconds; if it’s looking too dry, add more of the stock or water.
  5. Turn off the heat, add the basil and mix just until wilted. Taste and adjust the seasoning with more sugar or fish sauce as needed, and add a little more water or stock if it feels too dry. Set this aside while you fry the eggs.
For the Crispy Fried Eggs
  1. To fry the eggs Thai-style, I recommend frying them 1 at a time to prevent them from sticking to each other. There are 2 options for frying eggs:
  2. For crispy whites and semi-set yolk: Add about ¼ inch of frying oil to a small nonstick frying pan and put it over medium-high heat. Once the oil is hot, add the egg and allow the egg white to bubble. Use a spoon to occasionally baste the top of the egg with oil to cook the yolk. Once the whites are crispy and browned around the edges and the yolk is set to your liking, you can remove it from the pan.
  3. For eggs with crispy whites and runny yolk: Separate the egg white and the egg yolk. Add about ¼ inch of frying oil to a small nonstick frying pan and put it over medium-high heat. Once the oil is hot, add the egg white and let it fry until the edges start to turn brown. Use your spatula to push the middle of the white down to make an indent for the yolk to sit in. Once the egg white is browned around the edges, carefully place the yolk into the indentation, and use a spoon to baste some oil around the edges of the egg yolk to help it stick to the egg white. Remove from the pan and allow to drain.
  4. To serve, put jasmine rice on a plate, spoon the pad kra pao over half of the rice, and top everything with the fried egg. You can then drizzle the prik nam pla on top of the egg when ready to eat.
Recipe from Thai Hot Kitchen

    Tom Yum Goong (Red version)

    Ingredients
    350g medium sized shrimp, shell-on, head-on if possible
    4 cups water (or use 3 1/2 cups unsalted chicken stock if not using shell on shrimp)
    2 stalks lemongrass, bottom half only (see note)
    10 pc galangal, cut into thin rounds
    6 kaffir lime leaves
    Thai chilies, to taste
    ½ cup evaporated milk
    3-4 cups oyster mushrooms, straw mushrooms, or another Asian mushroom
    ¼ cup Thai chili paste (nam prik pao)
    3 Tbsp fish sauce
    ¼ cup lime juice
    A big handful of chopped sawtooth coriander (culantro) or cilantro

    Instructions
    1. Rinse shrimp well, then peel and devein them (see video for a cool deveining trick!) and place all heads and shells into a stock pot. Put the pot over medium high heat and saute the shrimp shells until stuff that sticks to the pot starts to brown slightly. It should smell like shrimp on the grill! 
    2. Add water, scrape off the browned bits that are stuck to the pot, and simmer for 15-20 minutes. Then, use a slotted skimmer to remove the shells, making sure to drain off as much of the liquid as you can. 
    If using chicken stock, start from here:
    1. Smash lemongrass and cut into chunks. Roughly tear the kaffir lime leaves. Finely chop the chilies or pound in a mortar and pestle into a paste.
    2. Bring the stock to a simmer, then add lemongrass, galangal, kaffir lime leaves and chilies (if you pounded the chilies, rinse the mortar with some of the stock to make sure you get all the chili bits into the pot). Simmer for 5 minutes. Note: The herbs are not meant to be eaten, so at this point you can either fish them out, but I like to leave some in there for garnish. Just be sure to tell your guests not to eat them!
    3. Add evaporated milk and bring to boil. Add mushrooms and cook for 1-2 minutes or until mushrooms are done.
    4. Add chili paste and fish sauce, and stir to dissolve the chili paste. Add shrimp meat and cook just until done, 30 seconds or so. 
    5. Turn off the heat and let the soup cool down slightly, just for a minute, so it is not simmering or boiling. Add lime juice while stirring.
    6. Stir in sawtooth coriander or cilantro, then taste and adjust seasoning as needed.
    Recipe from Thai Hot Kitchen

    Tuesday, December 6, 2022

    Chicken Lettuce Wraps

    Ingredients
    500g ground chicken
    1 small onion, diced
    1 Tbsp sesame oil
    1 Tbsp fresh ginger, chopped
    1 Tbsp fresh garlic, minced
    2 Tbsp rice wine vinegar
    4 Tbsp hoisin sauce
    soya sauce, to taste
    1 Tbsp, sriracha sauce
    salt & pepper, to taste
    2 Tbsp oil
    1 8oz can of water chestnuts, diced
    fresh green onion
    1 head butter lettuce

    Method
    1. Brown minced chicken in oil on medium heat (3-5 mins) & drain excess fat.
    2. Stir in onion, sesame oil, fresh ginger, garlic, rice wine vinegar, hoisin sauce & soya sauce until onions are translucent.
    3. Add sriracha sauce (or gochujang) to taste & cook until sauce thickens.
    4. Turn off heat & add water chestnuts & fresh green onion & stir in.
    5. Serve with butter lettuce.

    Saturday, December 3, 2022

    Mini Pavlova

    Prep Time: 30 minutes
    Cook Time: 1 hour 45 minutes
    Total Time: 2 hours 15 minutes
    Servings: 15 pavlovas

    Ingredients
    For Pavlova:
    6 large egg whites, room temperature
    300 g granulated sugar
    2 tsp corn starch
    1/2 Tbsp lemon juice
    1/2 Tbsp vanilla extract

    For Cream:
    350ml heavy whipping cream (very cold)
    2 Tbsp granulated sugar

    For Topping/Decor:
    950 g fresh fruit, blueberries, kiwi, raspberries, sliced strawberries, etc
    15 Mint leaves , for garnish, optional

    Instructions

    How to Make Pavlova:
    1. Preheat the Oven to 225˚ F. Line a large baking sheet with parchment paper. Using your stand mixer, beat 6 egg whites on high speed 1 min until soft peaks form. With the mixer on, gradually add 1 1/2 cups sugar and beat 10 min on high speed, or until stiff peaks form. It will be smooth and glossy.
    2. Use a spatula to quickly fold in 1/2 Tbsp lemon juice and 1/2 Tbsp vanilla extract, then fold in 2 tsp corn starch and mix until well blended.
    3. Pipe meringue into 3 to 3 1/2 inches wide nests onto the parchment paper using a Wilton 1M Tip. Indent the center with a spoon to allow room for cream. Bake at 225˚ for 1 hr and 15 min then turn the oven off and without opening the door, let meringue in the hot oven another 30 min. Outsides will be dry and crisp to the tap and very pale cream-colored and insides will still be marshmallow soft.
    4. Transfer the pavlova with the parchment paper onto the counter or a cookie rack and allow it to cool to room temp. Once cool, you can top them with whipped cream and fruit or store in an airtight container for 3-5 days at room temperature (in a low humidity place).
    How to Make Frosting and Assemble Pavlovas:
    1. Beat cold whipping cream with 2 Tbsp sugar in the cold bowl for 2 to 2 1/2 minutes or until whipped and spreadable.
    2. Pipe frosting onto the pavlova and top with fresh fruit.*
    Recipe Notes
    *These should be enjoyed within 4 hours of assembly.

    Recipe from Natasha's Kitchen

    Sunday, November 27, 2022

    Goulash

    Ingredients
    3 tbsp beef tallow
    2 brown onions, diced
    25g sweet paprika
    800g beef (I used flank), cut into 3cm pieces
    5 cloves garlic, minced
    2 red capsicums, diced
    1 yellow capsicum, diced
    2 tomatoes, diced
    1 carrot, diced
    2 medium potatoes, diced
    1L beef stock
    1 bay leaf
    Salt and pepper to taste
    Sour cream to serve
    Bread for the side

    Method
    1. In a heavy-based pot you have the lid for, heat the tallow and sweat the onions for 4 minutes.
    2. Add the beef and season with salt, brown this off for 6-7 minutes.
    3. Add the rest of the veg apart from the potato.
    4. Next add the paprika, bay leaf and stock and bring to a simmer.
    5. Stir well and cook for 2 hours on low before adding the potato and cooking for a further hour or until the meat and potatoes are fork-tender.
    6. Serve with sour cream and crusty bread.

    Wednesday, November 23, 2022

    Levain Bakery Chocolate Chip Cookies

    Prep Time 10 mins
    Cook Time 11 mins
    Total Time 21 mins

    Servings: 8

    Ingredients
    225g Cold Butter cut into small cubes
    213g Brown Sugar
    100g Sugar
    2 Eggs
    1 1/2 cups Cake Flour*
    1 1/2 cups Flour
    1 tsp Cornstarch
    3/4 tsp Baking Soda
    3/4 tsp Salt
    340g Chocolate Chips
    240g Walnuts roughly chopped

    Instructions
    1. Preheat oven to 210 degrees Celsius.
    2. In a large mixing bowl, cream together cold cubed butter, brown sugar, and sugar for 4 minutes or until creamy.
    3. Add eggs, one at a time, mixing well after each one.
    4. Stir in flours, cornstarch, baking soda, and salt. Mix until just combined to avoid overmixing. Stir in chocolate chips and walnuts.
    5. Separate dough into large balls and place on lightly colored cookie sheet. They are bigger than you think! You will fit 4 cookies on one large cookie sheet. The dough makes 8 extra large cookies.
    6. Bake for 9-12 minutes or until golden brown on the top. Let them rest for at least 10 minutes to set.
    Notes
    *can substitute all-purpose flour for cake flour
    *Levain Bakery has stated they don't use vanilla extract in their cookies. If you would like to add vanilla extract, I would suggest adding 1 teaspoon when adding the eggs to the batter.

    Author: Melissa Stadler, Modern Honey 

    Tuesday, November 8, 2022

    2-Day Chocolate Chip Cookies

    PREP TIME: 45 MINUTES 
    COOK TIME: 20 MINUTES 
    TOTAL TIME: 2 DAYS 65 MINUTES 

    INGREDIENTS 
    Toffee 
    85g unsalted butter 
    150g light brown sugar, lightly packed 
    1 tsp kosher salt 
    Water, as needed 

    Cookie Dough 
    226g unsalted butter 
    4 ice cubes 
    150g granulated sugar 
    300g light brown sugar, packed 
    2 tsp espresso powder 
    2 tsp kosher salt 
    ½ tsp baking soda 
    2 large eggs 
    2 tsp vanilla extract 
    300g all-purpose flour 
    168g 50-70% cacao chocolate, chopped 
    Flaky sea salt, for sprinkling 

    PREPARATION 
    1. Make the toffee: Line a baking sheet with parchment paper. 
    2. In a medium nonstick saucepan over medium heat, melt the butter, brown sugar, and salt, stirring until evenly incorporated. If there are grainy lumps or if the fat starts to separate, add a couple splashes of water and stir vigorously to emulsify. Continue to cook, stirring constantly, until the mixture reaches 143°C, about 10-15 minutes. 
    3. Pour the toffee onto the prepared baking sheet and spread out slightly with a spatula. Freeze until ready to use, about 30 minutes. 
    4. Make the cookie dough: Add the butter to a medium nonstick saucepan over medium-high heat. Cook, stirring occasionally, until the butter turns dark brown and smells nutty. Watch carefully so the butter does not burn. Remove the pot from the heat. 
    5. Add an ice cube to the butter and slowly let it melt. It may froth and bubble. Add the remaining 3 ice cubes and gently stir until melted. 
    6. In a large bowl, combine the granulated and brown sugar, espresso powder, salt, and baking soda. 
    7. Pour the brown butter into the sugar mixture and mix until combined. Don’t worry if it looks separated. 
    8. In a small bowl, whisk together the eggs and vanilla. Pour into the sugar and butter mixture and whisk until glossy and smooth. 
    9. Add the flour and fold with a rubber spatula to incorporate until the dough has no visible flour streaks. 
    10. Remove the toffee from the freezer (it should be a frozen disc) and break it into chunks that will fit inside a gallon zip-top bag. Double bag the toffee and seal both bags. With a rolling pin, break the toffee into small pieces. 
    11. Fold the crushed toffee and chopped chocolate into the dough until evenly distributed. 
    12. Using a large ice cream scoop or a ½ cup measure, scoop the dough onto a parchment-lined baking sheet. Wrap the baking sheet in plastic wrap, but leave a small opening at the corner of the tray. 
    13. Let the dough rest in the refrigerator for at least 48 hours. This will allow the flavor to develop and the dough to dry out a little as it rests, which will result in less spread when it bakes. 
    14. When ready to bake, preheat the oven to 163°C. Line 2 baking sheet with parchment paper. 
    15. Arrange the cookies on the baking sheets, leaving at least 2 inches of space between the cookies and away from the edges of the pan. 
    16. Bake until the cookies are golden brown with crispy edges, but are still slightly soft in the center, 18-20 minutes. Immediately sprinkle the cookies with flaky sea salt. then let cool completely. The cookies will be very soft at first but will set after they are fully cooled. 

    Tuesday, August 9, 2022

    Caesar Salad

    Ingredients
    1/3 cup olive or vegetable oil
    3 Tbsp lemon juice
    2 tsp anchovy paste
    1 tsp Worcestershire sauce
    1/4 tsp salt
    1/4 tsp ground mustard
    1 garlic clove, finely chopped
    1 large bunch romaine, torn into bite-size pieces (10 cups)
    1 cup garlic-flavored croutons
    1/3 cup grated Parmesan cheese
    Freshly ground pepper

    Method
    1. Mix oil, lemon juice, anchovy paste, Worcestershire sauce, salt, mustard and garlic in salad bowl.
    2. Add romaine; toss until coated. Sprinkle with croutons, cheese and pepper; toss.

    Tuesday, August 2, 2022

    Thai Fried Chicken & Som Tum

    PREP TIME 25 minutes + marinating
    COOK TIME 50 minutes
    SERVES 4

    Ingredients
    4 boneless chicken thighs (preferably with the skin on)
    2 cups plain flour or all-purpose flour
    vegetable oil for deep frying
    sea salt

    Marinade:
    4 garlic cloves
    2 coriander roots, cleaned and roughly chopped
    ½ tsp black peppercorns
    2 tbsp fish sauce

    Som Tum Papaya Salad:
    200g (7 oz) shredded green papaya*
    2 garlic cloves, roughly chopped
    2 birds’ eye chillies (use more or less to taste)
    2 snake beans, cut into 3cm-long batons (alternatively use green beans)
    ¼ cup dried shrimp, soaked in water for 5 minutes to soften
    2 tbsp roasted peanuts
    2 tbsp (about 20g) shaved palm sugar
    1½ tbsp fish sauce
    6 cherry tomatoes, halved
    2 tbsp lime juice
    1 tbsp soy sauce

    Steps
    1. For the marinade, use a mortar and pestle to pound the garlic, coriander roots and peppercorns to form a rough paste. Mix through the fish sauce. Then add the chicken and toss until well combined. Transfer to a large bowl. Set aside to marinate for 10-20 minutes.
    2. In a large som tum mortar, pound garlic and chillies until just smashed but still chunky. Drain the dried shrimp and add those. Pound lightly. Then add the green beans and peanuts and pound lightly. Add the palm sugar and pound to soften. Now add half the papaya and lightly bruise with the pestle, using a spoon to mix as you lightly pound. Add remaining papaya, fish sauce and tomatoes. Lightly pound with the pestle and mix with the spoon. Add the lime juice and mix until well combined. Taste and adjust with more fish sauce, sugar and/or lime juice to taste.
    3. Alternatively, the salad can be made by placing ingredients in a large bowl or a ziplock bag and using a rolling pin to bruise the ingredients.
    4. Coat the chicken pieces in the flour. To cook the chicken, fill a saucepan or wok to about 1/3 capacity with the vegetable oil. Heat over high heat. Once the oil is medium-hot (320°F or 160°C or when a wooden spoon dipped into the oil forms small little bubbles), add the chicken pieces and cook for about 10 minutes or until golden brown and cooked through. Turn the chicken pieces as they cook to ensure an even golden colour. Drain on kitchen paper and sprinkle with salt.
    5. Serve sliced fried chicken with som tum papaya salad.
    Recipe from Marion's Kitchen https://www.marionskitchen.com/thai-fried-chicken-and-som-tum/

    Wednesday, July 13, 2022

    Spaghetti alla Nerano, Zucchini Spaghetti

    Serves 4

    Ingredients
    6 medium zucchini, sliced into quarter-inch rounds
    Sunflower oil, for frying
    14 oz. spaghetti
    1 clove garlic, minced (optional)
    2 to 4 oz. grated cheese (such as aged Parmigiano Reggiano, Provolone del Monaco, or Caciocavallo)
    1 bunch fresh basil leaves
    A pat of butter (optional)
    Ground black pepper, to taste

    Directions
    1. Take thinly sliced zucchini rounds and deep-fry in sunflower oil until golden (or even slightly burnt).
    2. Put fried zucchini on a paper towel to absorb oil; let sit in a bowl for a few hours to rest (or put in the fridge overnight). Before using, dab them again with a paper towel to remove excess moisture.
    3. Boil spaghetti in lightly salted water until al dente. Save a cup of cooking water after draining spaghetti.
    4. Reheat zucchini in a frying pan with optional minced garlic.
    5. Place half of the zucchini into a clean pot or bowl, then add a few Tbsp. of cheese and a few Tbsp. of the pasta cooking water. Stir the mixture until cheese begins to melt. Add spaghetti, the rest of the zucchini, and cheese, and continue stirring until cheese and spaghetti water form a saucy emulsion. If the mixture seems too thick, add a bit more cooking broth. If it is too thin, add more cheese.
    6. Add fresh basil, butter, and black pepper, to taste.
    7. Serve with sprig of basil on top—with basil flower, if you have it—in a shallow bowl.

    * Adapted from Lo Scoglio da Tommaso and other Nerano restaurants.

    Wednesday, January 5, 2022

    Lentil Curry

    Ingredients
    50g (3 tbsp) butter , unsalted (sub 2 tbsp neutral oil)
    4 garlic cloves , finely minced (Note 1)
    1.5 tbsp ginger , finely minced (Note 1)
    1 onion , finely chopped (white, yellow, brown)
    2 tbsp curry powder , mild or spicy (your choice!) (Note 2)
    1/2 tsp tumeric powder
    1/2 tsp cayenne pepper , optional
    1 1/4 tsp salt
    1/2 tsp black pepper
    1 cup dried lentils , green or brown (or any other dried lentils or split peas, Note 3)
    400 ml / 14 oz coconut milk , full fat
    400g/ 14 oz canned tomato , crushed or diced
    3 cups (750 ml) water

    Serving:
    1/2 cup coriander/cilantro , finely chopped
    Yogurt , optional
    Basmati rice (or other rice)

    Instructions
    1. Saute onion: Melt butter in a pot over medium heat. Add onion, garlic and ginger. Slowly cook, stirring every now and then, for 10 minutes until tinged with gold and the onion is sweet.
    2. Cook off spices: Turn heat up to high, add curry powder and turmeric, stir for 1 1/2 minutes.
    3. Add everything else: Add remaining ingredients and stir. Bring to simmer, then place lid on and adjust heat to low / medium low so it's simmering gently.
    4. Simmer: Simmer for 30 minutes, then remove lid and simmer for a further 10 minutes to reduce the sauce. {Note 2 for cook times of other lentils} 
    5. Lentils should be soft, sauce should be thickened and creamy. Too thick, add water. Too thin, simmer with lid off - thickens quickly.
    6. Coriander: Stir through half the coriander, then taste and add more salt if needed.
    7. Serve over basmati rice, sprinkled with more coriander and a dollop of yogurt. (Low carb option - cauliflower rice).

    Notes
    1. Garlic and ginger - while fresh is ideal (followed by jarred), powder is a sufficient substitute - use 1 tsp of each and add with curry powder.
    2. Curry powder - I use Clives of India, Keens, and a generic brand and all tasted the same. The beauty of this recipe is that you don't need any fancy curry powder, just your run-of-the-mill jar from the grocery store.
    3. Lentils - use any dried lentils or canned here, or split peas (will result in an an interesting colour in your pot, but it will still be phenomenally delicious!).
    NOTE: Age of lentils will affect cook times. Very old dried lentils can take double the cook time. Just keep adding water until it is cooked. Cook times provided are packets purchased within the past few months from a grocery store (ie not super fresh but not extremely old).

    COOK TIMES:
    Green and brown lentils - most common & cheapest, cook per recipe
    Canned lentils (2 cans drained) - 25 min, uncovered the whole time
    Red split lentils - 25 min, uncovered the whole time
    Yellow or green split peas - 25 min, uncovered the whole time
    Any dal (Indian lentils) such as channa dal, toor dal or moong dal - per recipe
    French lentils (Puy lentils / black lentils) - not recommended as they don't soften as well as other lentils so you won't get the same creamy, thick texture.
    4. Storage - will keep in fridge for up to 5 days, and in freezer for 3 months (thaw, heat, give it a good stir and it will be as good as new. Use water to thin slightly if needed.)

    5. Nutrition per serving, excluding rice.
    Nutrition
    Calories: 414cal | Carbohydrates: 36g | Protein: 14g | Fat: 26g | Saturated Fat: 20g | Cholesterol: 22mg | Sodium: 782mg | Potassium: 865mg | Fiber: 15g | Sugar: 5g | Vitamin A: 544IU | Vitamin C: 13mg | Calcium: 91mg | Iron: 7mg

    Monday, December 6, 2021

    Sourdough discard waffles

    Ingredients
    142 g AP flour
    6 g baking powder
    30 g granulated sugar 
    4 g salt 
    2 large eggs
    170 g whole milk
    226 g sourdough starter, unfed/discard 
    40 g unsalted butter

    Method
    1. In a medium bowl, whisk together flour, baking powder, sugar, and salt until well combined.
    2. In a large bowl, whisk together eggs, milk, starter, and melted butter until well combined.
    3. Add dry mixture to wet mixture and whisk until just combined. (Depending on the thickness of the starter, you may need to adjust the batter's consistency. It should be the consistency of pancake batter. Add milk to thin it, if necessary.)
    4. Cook in waffle iron according to the manufacturer's directions. Serve right away with butter and maple syrup.

    Sunday, August 15, 2021

    Chicken Pot Pie


    Prep Time15 mins
    Cook Time1 hr
    Total Time1 hr 15 mins

    Ingredients

    Chicken & broth:

    • 600 g/1.2lb chicken breast (or boneless thighs)
    • 2 cups / 500 ml milk , any fat % (Note 1)
    • 1 cup / 250 ml chicken broth (stock)
    • 2 tsp chicken or vegetable stock powder (Note 2)
    • 2 sprigs thyme , optional

    Chicken Pot Pie:

    • 1 large onion , chopped
    • 2 large carrots (3 small). chopped
    • 3 celery ribs , chopped
    • 2 garlic cloves , minced
    • 50 g / 3 tbsp butter
    • 1 tsp dried thyme
    • 1/3 cup / 85 ml white wine
    • 1/3 cup / 50 g flour
    • 1/2 cup / 50 g grated parmesan
    • 1/2 tsp black pepper
    • 1 cup frozen peas , no need to thaw
    • 2 sheets puff pastry (enough to cover pots, with drape)
    • 1 egg , lightly whisked

    Instructions

    Chicken:

    • Place milk, broth and stock powder in a large saucepan. Bring to a very gentle simmer over medium heat, add chicken and thyme.
    • Place lid on, simmer gently on medium low for 15 minutes (do not boil, can make milk split).
    • Remove chicken, shred or dice (don't worry if inside a bit uncooked). Cover pot and set poaching liquid aside.
    • Chicken Pot Pie:
    • Melt butter in a large pot over medium high heat. Add garlic and onion, cook for 2 minutes. Add thyme, carrot and celery, cook for 3 minutes or until carrot is softened.
    • Add wine. Stir, scraping the bottom of the pot, and cook for 1 1/2 minutes or until wine is mostly evaporated.
    • Add flour and stir for 1 minute.
    • Add about half the reserved poaching liquid and stir until all flour is incorporated - it will be a thick sludge.
    • Add remaining milk broth, parmesan, pepper. Stir.
    • Add chicken and peas, stir.
    • Once mixture is heated (you'll see steam), cook for 3 minutes to thicken the sauce, stirring regularly. (Note 3)
    • Remove from heat. Spoon into oven proof pots - 4 large or 6 small (Note 4). Cool in fridge at least 30 minutes. (Note 5)

    Assembly & Baking:

    • Meanwhile, remove puff pastry from freezer to partially thaw. Then use a bowl as a guide to cut rounds from the pastry about 2.5cm / 1" wider (all the way around) than the pots - be generous!
    • Preheat oven to 180C/350F.
    • Brush edge of pots with egg. Top with puff pastry, folding down the edges.
    • Brush pastry with egg. Cut a 2cm / 2/3" slide in the middle with a small knife.
    • Bake 35 - 40 minutes until deep golden.
    • Serve immediately!

    Notes

    1. Cream option - if you'd like to make it even richer, reduce milk by up to 3/4 cup and swap for cream. But DO NOT ADD when poaching chicken, stir it in when the poaching liquid is added into the pot after adding flour.
    2. Stock powder - I like Vegeta which is a vegetable stock powder. Or use 2 x chicken bouillon cubes, crumbled.
    3. Sauce thickness - whatever the sauce thickness at this stage is what it will be when the pies comes out of the oven.
    4. Pot Sizes - Use 4 large about 2 cups / 500 ml / 16 oz capacity (about 11 - 12 cm wide) OR 5 to 6 smaller ones about 375ml / 1.5 cups / 12 - 13 oz (~10cm wide). Or one large pie dish / skillet - 8 cups / 2 L / 2 quarts.
    5. Cool Filling  - hot filling will melt the butter in the puff pastry dough, resulting in less puffing. As long as the surface of the pie filling is cool(-ish), that's good enough.
    6. Pie Base - A number of readers have asked how to make this using puff pastry as a pie base. Here's how: Spray pots with oil or grease with butter. Line pots with puff pastry with excess to drape over the edge, then place in oven at 180C/350F. After 10 minutes or whenever the partially cooked base starts to puff up, just push it back down. Repeat once more or as required to stop the puffing (it doesn't take much). Then once the pastry is golden, remove from oven and let cool. Fill with COOLED filling. Brush egg across the pastry rim then top with puff pastry lid. Bake per recipe, turn out of pots. 
    7. STORAGE: To freeze or refrigerate uncooked, cool filling completely. Then top with pastry, egg wash, cut slit. Freeze 3 months or refrigerate up to 2 days. Thaw overnight (if frozen) then bake per recipe. Note: Thawed then refrozen puff pastry as well as thawed then refrigerated puff pastry does not puff up quite as much but the difference isn't significant.
    Cooked Chicken Pot Pies will keep in the fridge for up to 4 days. Best reheated in the oven covered in foil so the pastry can crisp up slightly, 20 minutes at 180C/350F.
    8. Nutrition per serving 
    Nutrition Facts
    Chicken Pot Pie
    Amount Per Serving
    Calories 588Calories from Fat 234
    % Daily Value*
    Fat 26g40%
    Saturated Fat 11g69%
    Cholesterol 144mg48%
    Sodium 1191mg52%
    Potassium 1152mg33%
    Carbohydrates 36g12%
    Fiber 4g17%
    Sugar 12g13%
    Protein 47g94%
    Vitamin A 6245IU125%
    Vitamin C 22.4mg27%
    Calcium 344mg34%
    Iron 2.9mg16%
    * Percent Daily Values are based on a 2000 calorie diet.